Gear pump rotor balancing
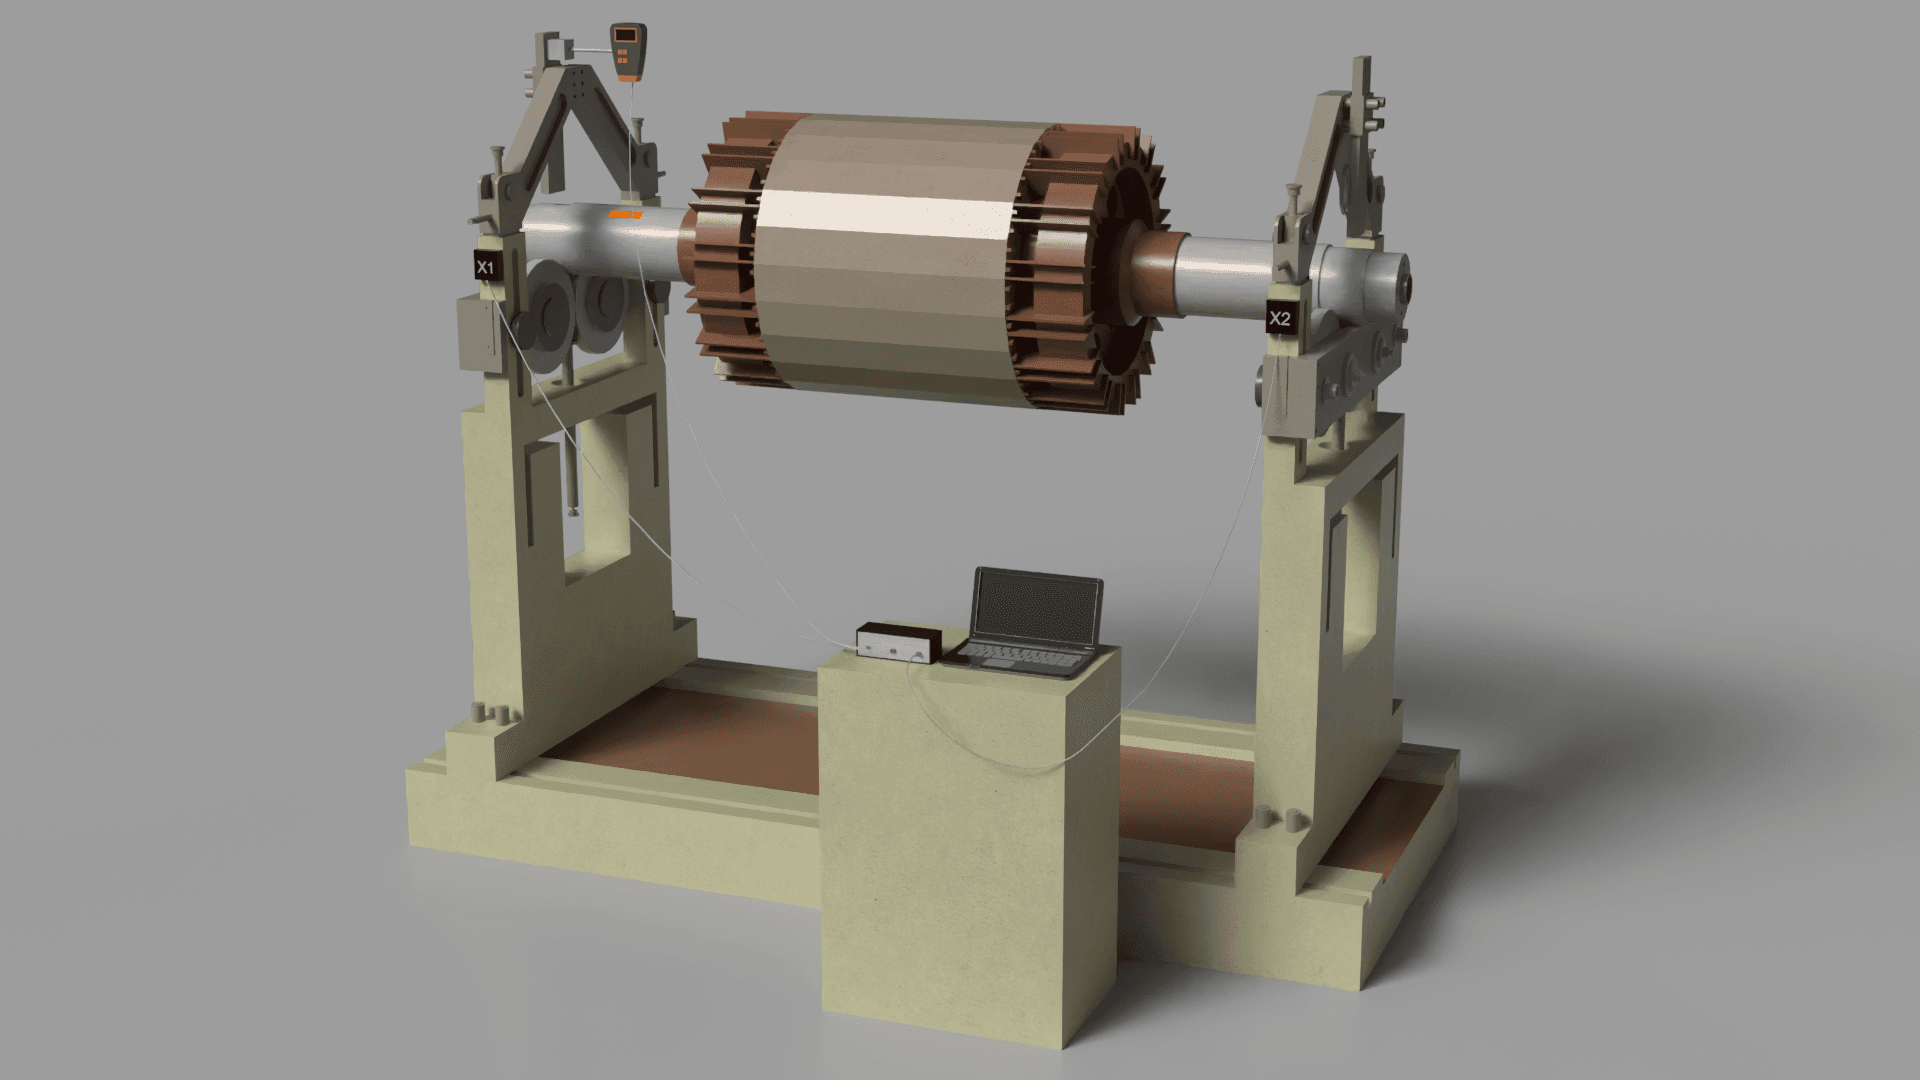
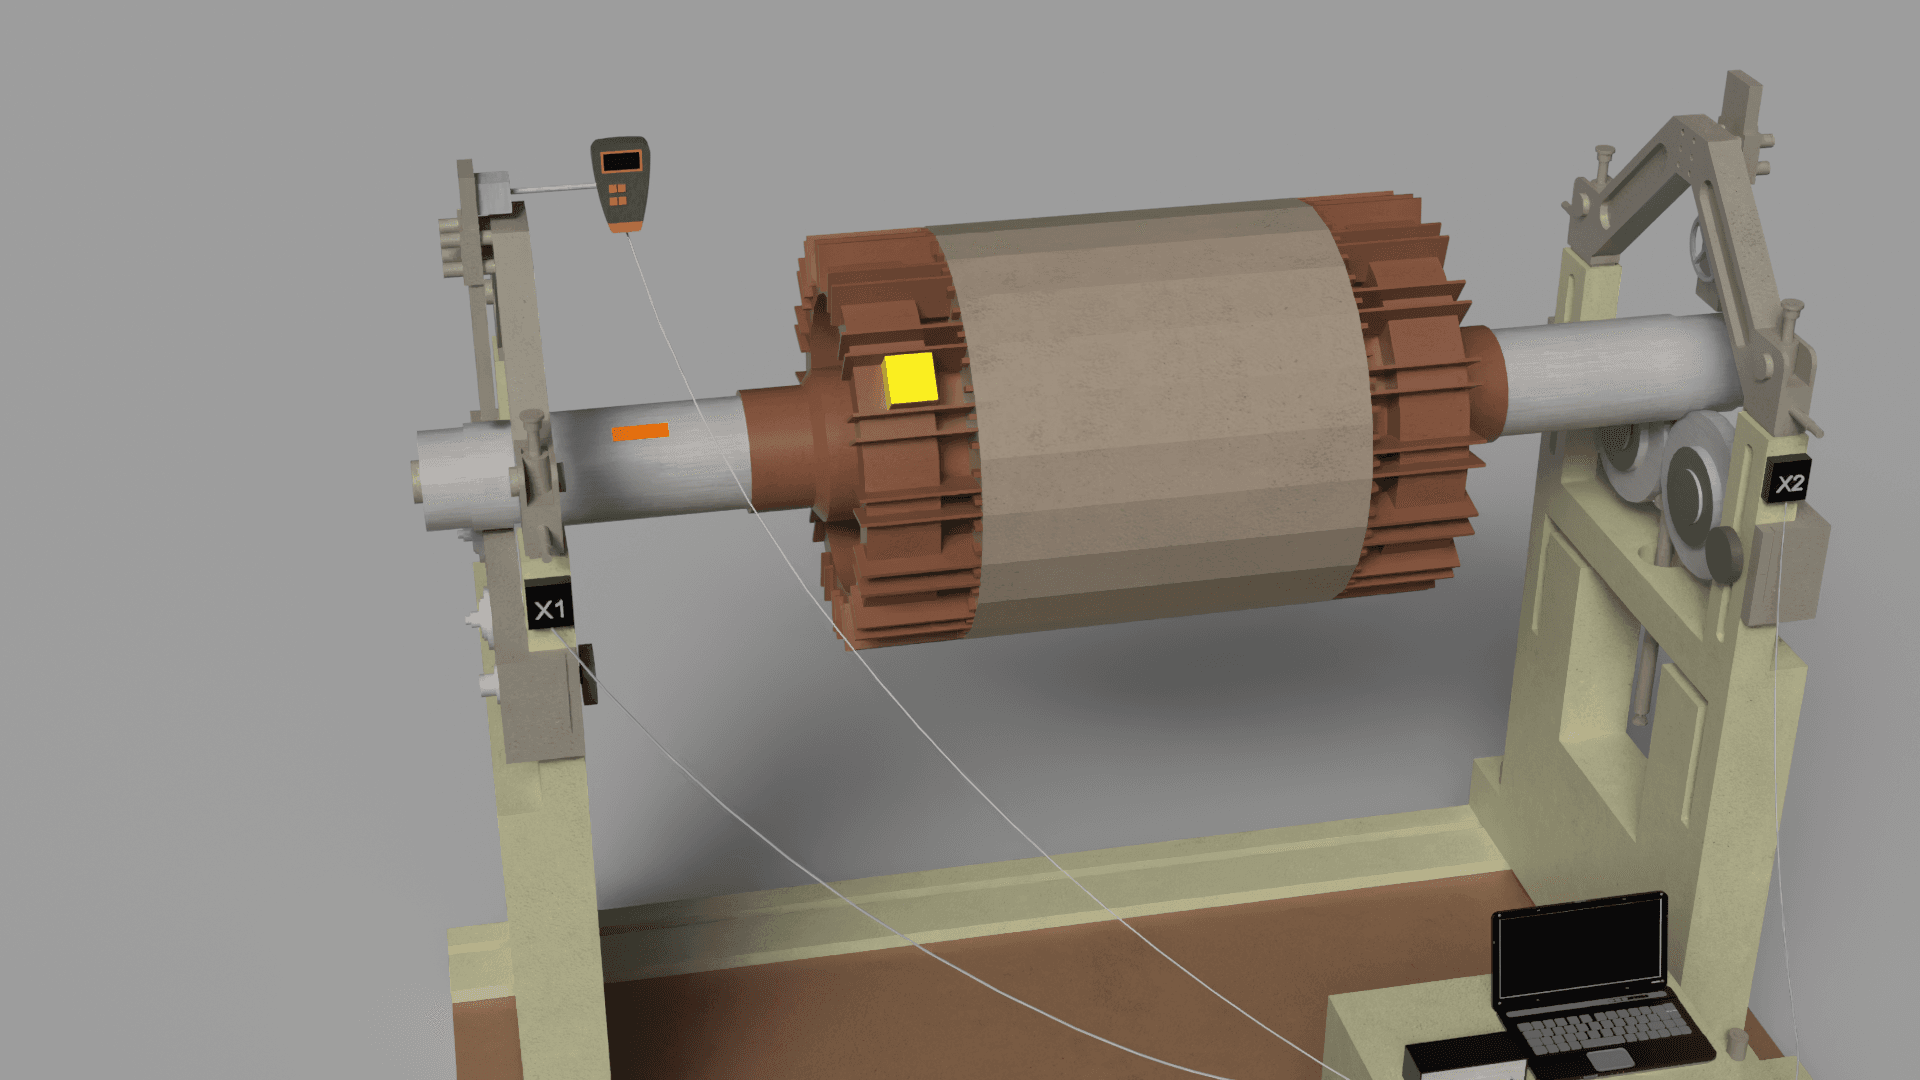
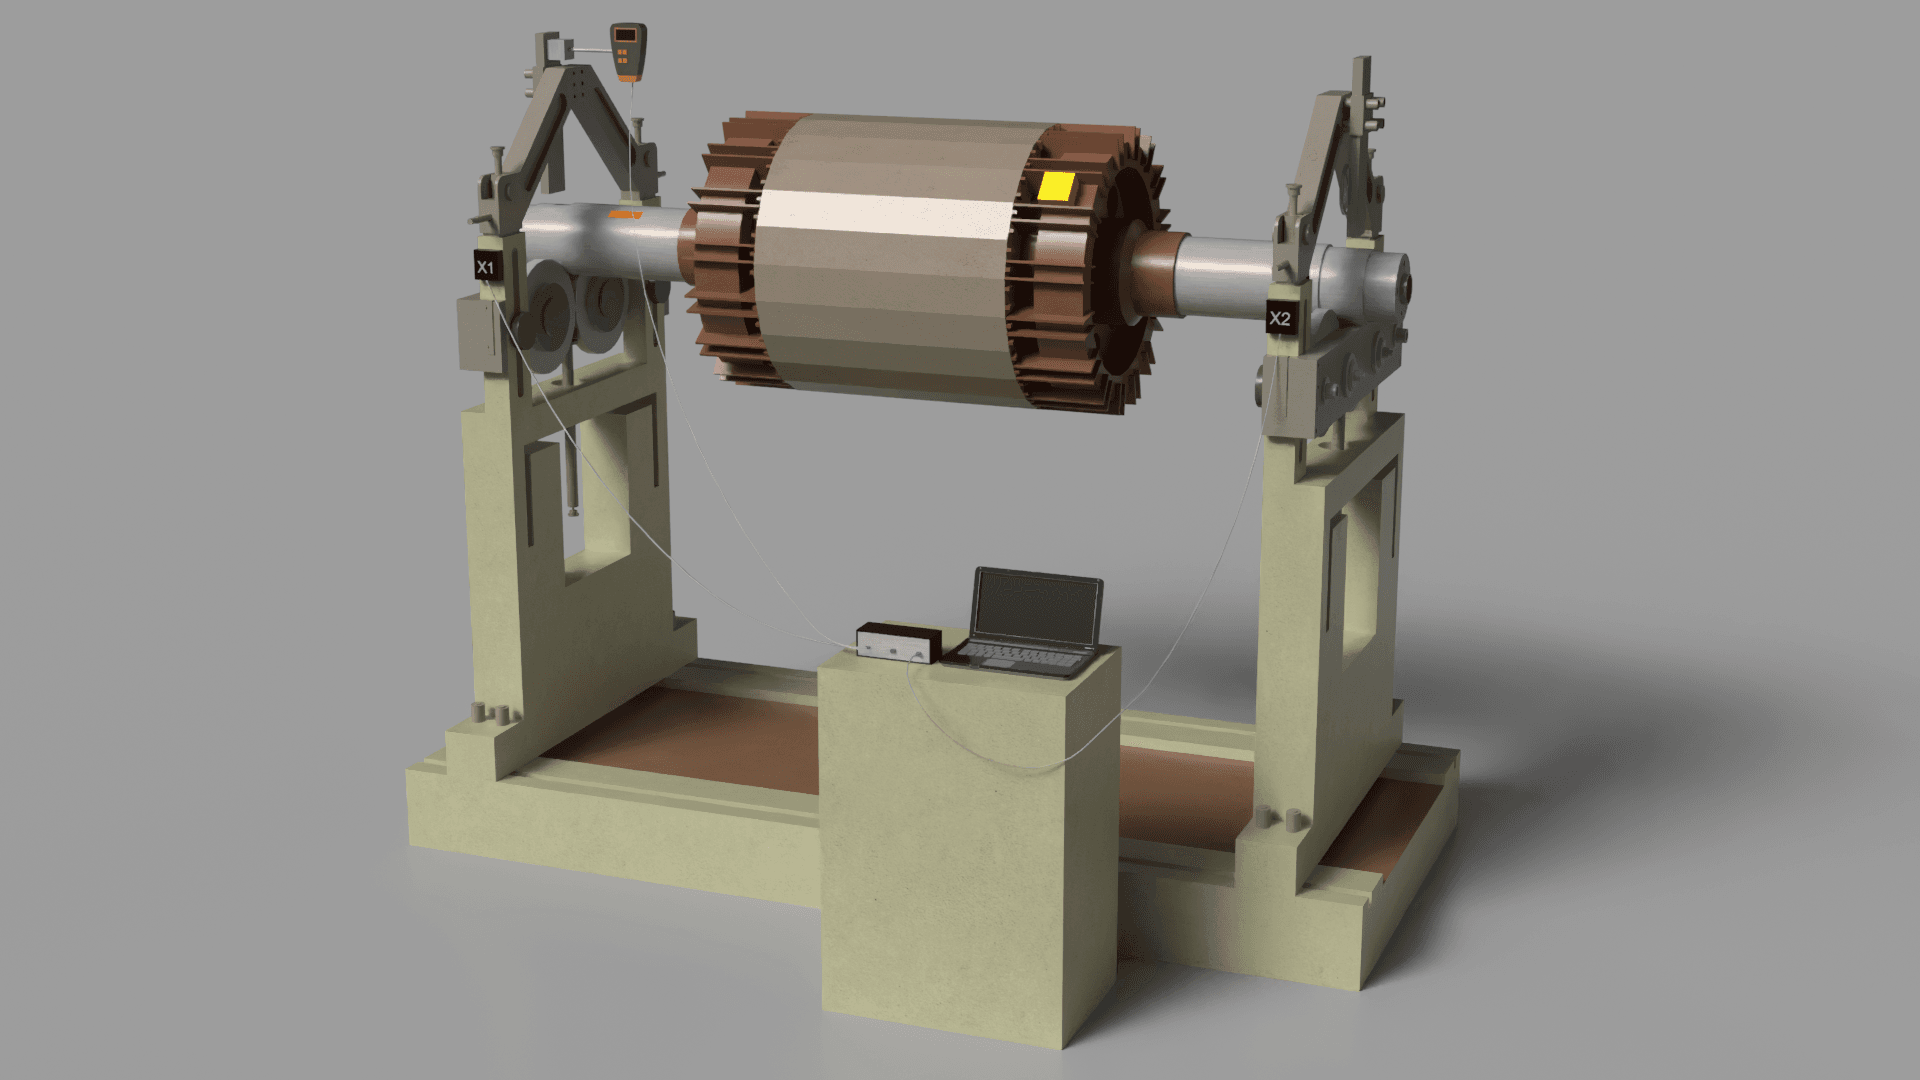
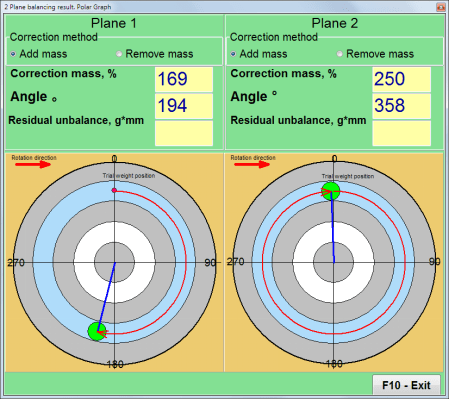
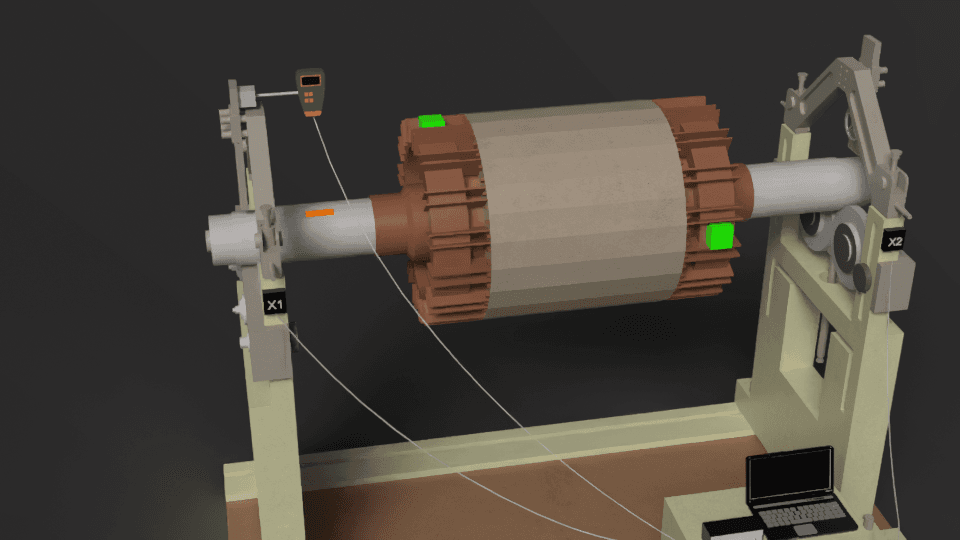
eqiblypaw - 26 days ago<h2> Detailed Rotor Balancing Process </h2> <h3> Preparing the Necessary Tools </h3> <ul> <li> vibration sensors, optical speed sensor, magnetic base, software package, and included accessories. </li> <li> Connect the device to your PC using the USB interface and confirm the software installation. </li> </ul> <h3> Sensor Installation </h3> <ul> <li> Fix the accelerometers securely to the machine's structure in locations where vibrations are most prominent, ideally near the bearings. </li> <li> Position the laser tachometer (phase angle sensor) so that it is aimed at the rotor. Attach reflective tape to the rotor for accurate phase angle reading. </li> </ul> <h3> Launching the Software </h3> <ul> <li> Initiate the Balanset program on your computer. </li> <li> Configure the software for either single-plane or two-plane balancing, based on the rotor's characteristics and the desired outcome. </li> </ul> <h3> Taking Baseline Vibration Readings </h3> <a href="https://vibromera.eu/wp-content/uploads/2024/11/2-Camera_01.png" target="_blank"> <img src="https://vibromera.eu/wp-content/uploads/2024/11/2-Camera_01.png" alt="2-Camera_01" style="width: 50%; display: block; margin-bottom: 10px;"> </a> <ul> <li> Bring the rotor to its normal operating rotational frequency. </li> <li> The program will record the vibration amplitude, rpm, and phase, providing a baseline measurement of the existing imbalance. </li> </ul> <h3> Mounting the Test Weight </h3> <a href="https://vibromera.eu/wp-content/uploads/2024/11/3-Camera-2_01.png" target="_blank"> <img src="https://vibromera.eu/wp-content/uploads/2024/11/3-Camera-2_01.png" alt="3-Camera-2_01" style="width: 50%; display: block; margin-bottom: 10px;"> </a> <ul> <li> Stop the rotor and attach a trial weight at a specific location on the rotor. The weight's mass can be specified within the software (e.g., in grams). </li> <li> Resume rotor operation, and the program will capture the resulting changes in vibration amplitude and phase. </li> </ul> <a href="https://vibromera.eu/wp-content/uploads/2024/11/5-Camera_01.png" target="_blank"> <img src="https://vibromera.eu/wp-content/uploads/2024/11/5-Camera_01.png" alt="5-Camera_01" style="width: 50%; display: block; margin-bottom: 10px;"> </a> <h3> Determining the Corrective Mass </h3> <ul> <li> The software uses the measured values to automatically compute the necessary compensating weight's magnitude and placement angle. </li> <li> The results of the calculation are shown both numerically and visually through charts and graphs. </li> </ul> <a href="https://vibromera.eu/wp-content/uploads/2024/02/Bs1ManualEngV156-May2023-10448629.png" target="_blank"> <img src="https://vibromera.eu/wp-content/uploads/2024/02/Bs1ManualEngV156-May2023-10448629.png" alt="Bs1 Manual" style="width: 30%; display: block; margin-bottom: 10px;"> </a> <h3> Mounting the Compensating Weight </h3> <ul> <li> Attach the computed compensating weight to the rotor as indicated by the software's output. </li> <li> Periodic checks can be performed to ensure the balancing procedure is effectively reducing the vibration. </li> </ul> <a href="https://vibromera.eu/wp-content/uploads/2024/11/1-Camera-2_01.png" target="_blank"> <img src="https://vibromera.eu/wp-content/uploads/2024/11/1-Camera-2_01.png" alt="1-Camera-2_01" style="width: 50%; display: block; margin-bottom: 10px;"> </a> <h3> Final Check and Balance Confirmation </h3> <ul> <li> After installing the correction weight, run the rotor again and check the residual vibration level. </li> <li> The balancing procedure is finished if the remaining vibration is within the permissible limits specified in ISO 1940. </li> <li> If the vibration level remains high, repeat the process with further weight adjustments. </li> </ul> <h3> Creating a Balancing Report </h3> <ul> <li> The balancing results are saved in the software's archive. You can create and print a report containing vibration data, correction weight mass, and its installation angle. </li> </ul> <h3> Concluding Steps and Verification </h3> <ul> <li> Double-check that all weights and sensors are securely fastened. </li> <li> Check that the rotor's rotation is smooth and free from undue noise or vibration. </li> <li> In cases where the rotor is integrated into a more complex system, ensure the correct operation and interaction of all related components. </li> </ul> <p> Following this procedure enables accurate balancing, minimizes vibration, and prolongs the service life of the equipment. </p> Instagram: https://www.instagram.com/vibromera_ou/ Youtube : https://youtu.be/guA6XJ-ArZM?si=vmkuX7RILzKBl0zL Our website about <a href="https://vibromera.eu "> Vibration analysis software features </a> Machinio: https://www.machinio.com/listings/98380186-portable-balancer-vibration-analyzer-balanset-1a-full-kit-in-portugal Facebook: https://www.facebook.com/marketplace/item/350151228150722